Showing posts with label recipe. Show all posts

Thursday, January 23, 2014

2014 - 52 in 52 #6 - Creamy Spinach and Sausage Pasta

I am always on the look out for easy dinners.  Both my husband and I work full time jobs.  Plus I have my insane commute which takes me at least an hour and a half to get home in the evenings.  Needless to say by the time I get home I am normally less than excited about cooking a bit fancy meal.  I need something easy to prepare and easy to clean up so we are not up half the night scrubbing pans.  If I can find one pot meals, even better! 
 
I first found this recipe(link) when I was looking for new meals per my husband’s request for this month.  It has all of the ingredients to make an awesome dish – cheese, pasta, and sausage. 
 
I have never pan fried a smoked sausage like that before and I had no idea how much grease was actually produced.  You will need to know that ahead of time and make sure that you dispose of that properly.  Please don’t dump it down the sink.  I laid down several super thick napkins and drained the sausage on those before I added the onions. 
 
This recipe was simple to make with very simple ingredients and it turned out awesome!  Both my husband and our eldest daughter remarked at how good it was while they were eating.  My husband even requested for us to make this again, which is a step in the right direction.  I was apprehensive when reading through the ingredients about how the dish was going to turn out with the Rotel and spinach together but it was actually an awesome taste.  We added some pepper jack cheese to ours and the spice level was awesome.  It was a bit spicy but overall not too much so that your mouth was on fire.  The sauce was creamy and the dish overall had just the right amount of seasoning and heat.  The spinach added an extra flavor that really balanced out the entire dish.  We will definitely be making this again!
 
Creamy Spinach and Sausage Pasta
Prep time: 10 mins
Cook time: 20 mins
 
Ingredients:
1 Tbsp olive oil
1 package smoke sausage – we used a kielbasa
1 medium onion, diced
1 can diced tomatoes and green chiles
2 cups chicken broth
8 ounces pasta – we used egg noodles
3 cups spinach, chopped
4 ounces Monterrey jack cheese, shredded
2 ounces pepper jack cheese, shredded
 
Instructions:
 
In a high sided skillet, cook sausage in olive oil until browned over medium high heat.  Drain off excess grease.  Add onions and cook until onions are softened (approx. 6 minutes).  Add diced tomatoes and green chiles and chicken broth.  Use spatula to scrape up all browned bits from the bottom of the pan.  This is your flavor and you don’t want to lose this!  Bring mixture to a boil.  Add pasta and return to a boil.  Once liquid has reached a boil, ensure that all noodles are at least partially submerged, and cover with a lid.  At this point you should reduce your heat so the liquid remains at a simmer.  Simmer for 10 minutes stirring occasionally to ensure that nothing sticks.  After 10 minutes, add cheese, cover with the lid and heat until cheese is melted. 


Enjoy!


Wednesday, January 22, 2014

Chewy M&M Cookie Bars

 
One of my long standing vices and guilty pleasures is to watch cooking shows.  When we subscribed to cable, I would watch the Food Network, the Cooking channel, etc.  Now that we have Netflix and Hulu for TV, I don’t have access to those channels.  I was originally sad but then I realized that there are a million different little cooking shows on YouTube.  Some vloggers are making a living at posting recipe videos on YouTube, which is amazing.  Two of my favorites are definitely Laura Vitale www.laurainthekitchen.com and Divas Can Cook www.divascancook.com.  These two ladies are awesome and really have taught me a lot about cooking different foods and recipes that I wouldn’t normally have tried. 
 
When I was trying to prepare for Silas’s birthday party, I was brainstorming about what kind of cookie would look cute with his monster theme.  I will freely admit that I am not a cookie or a cake decorator, so I am not trying to look professional with it.  I am just trying to fix something that will look cute and go with the theme.  That week Monique from Divas Can Cook posted a recipe video for her M&M Cookie Bars and I knew that I had found it.  I was using basic standard rainbow hued colors for his party, so M&M’s were the perfect complement to that, plus they would be good for little hands since we had a number of children coming to his party. 
 
I watched the video a few times and then sought out the actual recipe on her website.  Because it was right after Christmas and I went crazy baking this year, I had all the necessary ingredients on hand.  They were really easy to make and tasted awesome.  They were soft and chewy and sweet.  We got numerous compliments on them and the biggest compliment of all was that all of them were gone before the party was over.  I will definitely be making this again!  The dough, itself, is delicious and very customizable.   You could easily alter this recipe as well to include chocolate chips, different flavors of candies, like Reece’s candies, etc. 
 
M&M Cookie Bars
Prep time: 10 mins
Cook time: 40 mins
 
Ingredients:
2 ¼ cups flour
½ tsp salt
½ tsp baking soda
12 Tbsp butter, melted
1 cup brown sugar
½ cup white sugar
1 egg
1 egg yolk
2 tsp vanilla
1 ½ cups M&M’s
 
Instructions:
Preheat oven to 330 degrees F.   Line a 13x9 pan with parchment paper.  Combine flour, salt and baking soda in a small bowl and set aside.  Cream together melted butter and sugars.  I used a wire whisk for this but you could easily use a stand mixer, if necessary.  Stir in egg and egg yolk until well combined.  Stir in vanilla extract.  Combine flour mixture and butter mixture just until combined.  Be careful not to overmix or your cookies will become tough.  Add in 1 cup of M&M candies.  Pour dough into parchment lined pan and press down with clean hands until an even layer is achieved.  Work quickly as butter will make dough sticky with the heat of your hands.  Press remaining candy into the top of your cookie bar.  Bake for 40 minutes or until edges are set and a toothpick in the middle comes out clean.  (The original recipe calls for 25-30 minutes of bake time, but my cookie was REALLY underdone at that time.  Your oven may cook differently, so be aware.)  Immediately remove from pan and allow to cool completely.  Cut into squares. 
 
Enjoy!


Monday, January 20, 2014

2014 52 in 52 #5 - Baked Gnocci with tomato, bacon and mozzarella

Everything is better with bacon and cheese, right? 

I first found this recipe when I was looking on Pinterest for new recipes at my husband's request.  I am not normally a fan of tomatoes that are visible in food, but I figured that I would make a sacrifice this time because the rest of the dish sounded that it would be tasty. 

I had a semi-boring day at work today; not that I wasn't busy, just bored, so I figured making a longer recipe today would be better than saving this one for a different day where I was more stressed out during the day.  Plus all I needed to have unfrozen was some bacon that I bought yesterday.  It seemed like everything was lining up perfectly for today to make an awesome dinner.

Now the original recipe was written in grams instead of any sort of cups/ounces measurement, so I will spare you the conversion and write mine in ounces. 

This recipe has a few steps to it but the result is awesome.  It was flavorful and creamy and was an excellent answer to the need for comfort food.  A lot of the steps were completed simultaneously so overall this recipe takes a relatively short amount of time to cook. 

Baked Gnocci with tomato, bacon and mozzarella
Prep time: 10 mins
Cook time: 30 mins  

Ingredients:
8 ounces bacon, chopped into small pieces
2 cloves garlic
1 tsp smoked paprika
1 14 oz can diced tomatoes
handful cherry or grape tomatoes, halved
1 tbsp. tomato paste
1 tsp sugar
2-3 tbsp. cream
small handful fresh parsley
salt and pepper to taste
17 oz gnocci
4 oz mozzarella cheese

Heat oven to 400 degrees F.  Bring large pot of salted water to a boil. 

In high sided skillet, fry chopped bacon until crispy.  Drain excess grease.  Add garlic and paprika and fry for 30 seconds.  Add all tomatoes, tomato paste, and sugar and simmer for 5 minutes.  Remove from the heat and add cream, salt, pepper, and parsley. 

Boil gnocci until they float.  Remove from water with a spider strainer and add to sauce.   Incorporate sauce and gnocci and pour into oven safe baking dish.  Top with mozzarella cheese and bake for 10 minutes or until cheese is melted. 

Allow to sit for 5 minutes before serving. 

Enjoy!


Tuesday, January 7, 2014

2014 - 52 in 52 #2 - Baked Ravioli

I first pinned this recipe last year sometime.  I am always looking for simple and quick recipes for the weekdays.  The last thing that I want to do is come home after a long day at work and more than an hour and a half commute home and cook dinner.  This is one of the main reasons why I wanted to try freezer meals – I am not in the mood to cook dinner by the time that I get home from work. 
 
So I found this recipe for something called baked ravioli.  Shortly after I pinned this recipe, a woman on Youtube named Amy with the handle dreamflight6000 made this video where she made this recipe for a baked ravioli.  Now, you have probably read me talk about Amy before on another post – I love her!  She is really funny and smart and an excellent mother to her two boys (and pregnant with a third!), and she is a self-proclaimed picky eater.  I knew that if she and her family loved this recipe than certainly I could get my hungry albeit sometimes picky kids to eat it.
 
In my meal plan for the month of Dec-Jan (I decided that I need to do my meal plan for the end of one month and beginning of the next – better for our budgets and my sanity), I decided to try to make this meal.  I bought the ingredients and forgot about it.  If you follow me on Facebook or talk to me in person then you know that my home has been an acting convalescent home for some time with this crud that we are all passing around.  Well, Friday it came to a head with my son.  He was feeling awful and whiney, and needing to be held by someone and rocked most of the day.  For anyone who has now or who have ever had a toddler, you know those days.  I had no idea what I was going to make for dinner.  Luckily this recipe came to mind and it ended up being perfect. 
 
Isabella is a busy girl lately.  She just turned three, and she is all about helping.  I don’t want to stifle that help, because I don’t want her to turn into a sloth or (further) demanding toddler.  She is all about wanting to help in the kitchen.  I would LOVE to have the storage space for one of those Learning Towers, but alas, this rental that we are in has NO storage space, hence the reason why we had to build shelves to use our coat closet as a second pantry.  I will further explain that later.  She loves to help me cook, but since we have a gas stove, I am less than excited about the possibility of her doing that, especially since he will want to follow closely behind her and he has no natural apprehension towards fire like she does.
 
This recipe was awesome for them because it was simple and they were able to help.  It honestly is just laying several different pieces together and tossing it in the oven.  You could easily make this your own by substituting different kinds of ravioli, or different kinds of pasta sauce, etc.  We just used regular cheese ravioli and a traditional pasta sauce.  I do fresh grate my cheese always so that was just standard mozzarella from the store.  Let me know what substitutions you would do and I will check them out!
 
Baked Ravioli
Prep time: 5 mins
Cook time: 45 mins
 
Ingredients:
1 28 oz jar pasta sauce
1 package frozen raviolis (do not thaw)
8 oz grated mozzarella
½ cup Parmesan, to taste
¾ Tbsp Italian seasoning
1 tsp Garlic powder
 
Instructions:
Grease a 9x13 pan liberally with cooking spray and heat your oven to 400(check) degrees.  Spread about ¾ cup pasta sauce in the bottom of the pan.  Layer half of the frozen ravioli over the sauce in an even layer.  Spoon half of the remaining sauce over the top of the ravioli.  Top with half of your mozzarella cheese and half of the Parmesan cheese.   Repeat that layer ensuring that you use all sauce and cheese.  I sprinkled the top of this with Italian seasoning and garlic powder to give it more flavor.  You can certainly omit those if you feel like you get enough flavor from your sauce or pasta, but I felt like it would need a little something.  (The picture above is what it looks like right before it goes into the oven.  No after picture - sorry we were too busy enjoying!) 
 
Cover with aluminum foil and bake for 30 minutes.  Remove foil and bake another 10-15 minutes until cheese is browning and completely melted.  Let stand 10-15 minutes after removal from oven before serving to allow the dish to set and the sauce to not be so runny. 
 
Enjoy!           

Friday, January 3, 2014

2014 - 52 in 52 #1 Homemade Electrolyte Drink

Our household is sick right now.  Definitely a less than ideal way to ring in the New Year.  We have that same crud that everyone has that is going around - cough, congestion, runny nose, etc.  I think every third person in the Metroplex has this junk right now. 

This morning when my son woke up, I looked at him and could instantly tell that he was considerably worse than the night before when he went to sleep.  He was coughing but you could tell that the mucus in his chest almost sounded solid.  He was acting ridiculously tired even though he just woke up and he was VERY shallow breathing.  I am not proud to admit, but I do use Dr. Google more than I would like to say to determine how serious the internet feels like mine or my children's symptoms are.  Now, of course, I know to weed out all of the 'you might have brain cancer' rulings that several websites tend to come up with.  I was reading a few things and it sounded like if we went to the doctor for a diagnosis that there wouldn't be anything that they could do for him that I couldn't do myself at home, i.e. hot shower, vaporub on the feet with socks, etc.  I am more than capable so I decided to forgo the hour long drive to the doctor, the long wait in the waiting room with other sick kids and the more than one hour long drive back home from the doctor in rush hour traffic and just handle it myself. 

After a small dehydration scare that we had this last year with Silas I am super nervous that we would run into that again, so I knew that I wanted to make sure that even though they weren't interested in eating that they kept drinking.  Normally they drink milk and watered down juice.  Separately, of course.  Of course, since they are super congested and coughing, I don't like them to drink milk.  I know that some parents aren't from that same school of thought but I don't believe that people should drink milk in that situation.  It just makes it worse.  So, because of that thought I wanted to give them something special to drink to make sure that they drink enough liquids. 

My kids love sports drinks.  Normally if we are out and about and stop for a drink we will get them a sports drink and water it down for the two of them since I don't give them sodas or anything like that.  However, I want to get away from that because I have been reading a lot of articles about ingredients that you shouldn't drink that are in sports drinks.  A few weeks ago, I saw a bunch of posts about a Homemade Electrolyte Drink and wanted to pin it because I knew that it might come in handy in a time like this in the future.  Little did I know this would happen sooner than I thought...

Now, I cut down this recipe a lot since this blogger used 12 oranges and I only had four, but I used the same proportions except I added probably double, if not triple the water.  I water down any of their drinks, except milk, so it was only natural for me to put extra water.  The kids seem to like it.  I think that it has too much salt for me but I am not the least bit dehydrated, so maybe it's fine for that time.  This is really convenient if you have a large volume of fruit laying around, but it's not often that I have at least 4 oranges laying around.  Maybe you could do this with pineapple juice, apple juice or orange juice from the bottle perhaps that you could buy a larger volume of just the juice from the store. 


Homemade Electrolyte Drink
Prep time: 10 mins

Juice of 4 oranges
1/4 tsp salt
2 tbsp. sugar
6 cups water

Add all ingredients into a jug and mix together until sugar and salt are dissolved.  Refrigerate and serve. 

I will definitely be making this again anytime that my kids are sick and I want them to stay hydrated. 

Enjoy!

Wednesday, December 11, 2013

52 in 52 #33 - Homemade Chicken Fried Rice

I love chicken fried rice.  It is honestly one of my favorite things to order from any Chinese restaurant.  Other than egg rolls, but who doesn't love egg rolls?  I know that it sounds boring to say that fried rice and egg rolls is one of my favorite dishes to order, but anyone who knows me will tell you that I am not an adventurous eater.  I like certain things and I rarely step out of that comfort zone to test anything else. 

I wanted to figure out how to make chicken fried rice at home, because it seems like it would be easy and something that I could make quickly on a busy night when I have nothing else planned.  I found this recipe on Pinterest which made it almost seem comical how easy it looked to make.  I don't know that I have mentioned this before but thanks to Grace's generous grandmother we have been getting farm fresh eggs... they are awesome!  If you only buy eggs from the store, you forget what an egg is supposed to look like - note the awesome orange color of the yolk! 

It took a bit to prepare because you have several pieces (chicken and rice) that ultimately get combined together once they are cooked, but the combination of the items was super easy.  The result was something that tasted like it could have come from any half-decent Chinese food restaurant.  It wasn't the best fried rice that I have ever had but it was definitely something that I would make again, especially considering the ease that it came together. 

Try it and let me know what you think!

Homemade Chicken Fried Rice
Prep time: 35 mins
Cook time: 15 mins

Ingredients:
4 cups rice, cooked
2 chicken breasts, chopped and cooked
3 Tbsp sesame oil
2 cups frozen peas and carrots
1 medium onion
2 cloves garlic
2 eggs
1/2 cup soy sauce

Instructions:
Prepare rice and chicken.  I cooked our rice according to the bag instructions and I sautéed the chicken in a little bit of olive oil with some salt and pepper to taste.  In a large saucepan, heat sesame oil over medium heat.  Add peas & carrots, garlic and onion and sauté until soft.  Once softened, add eggs and scramble.  Add rice, chicken and soy sauce and cook for approximately 5 minutes until all ingredients are heated through. 

Serve warm. 

Enjoy!


Saturday, December 7, 2013

52 in 52 #31 - Loaded Baked Potato Casserole

Our friends Jim and Tracy made this amazing twice baked potato casserole for us when we visited them for dinner one night.  I had always heard rumors of this delicious dish but had never tasted it until that night.  It was amazing.  Creamy, cheese-y, and utterly amazing.  I mean, who doesn't love anything with bacon and cheese? 

I found this recipe for a Twice Baked Potato Casserole and decided to give it a try for myself. 

Twice Baked Potato Casserole
Prep time: 25 mins
Cook time: 30 mins

Ingredients:
5 lb potatoes, peeled and diced
1 cup sour cream
10 slices bacon, cooked, drained and chopped into small pieces
1/2 cup melted butter
8 ounces cream cheese
2 cups shredded cheese
2 tsp salt
1/2 tsp pepper
chopped green onions

Instructions:
Preheat oven to 350 degrees.  Boil peeled and diced potatoes until fork tender.  Drain potatoes and put in stand mixer.  Add butter, sour cream, and cream cheese.  Mix until completely combined.  Add 1 and 1/2 cups shredded cheese, salt, pepper, and 1/2 bacon.  Mix well.  Press into well greased 13x9 pan and top with remaining cheese.  Bake for 30 minutes or until cheese is melted and potatoes are heated through.  Garnish with remaining bacon and serve warm. 

Enjoy! 


52 in 52 # 30 Salsa chicken

Over the last few years, I have a new found love for making food for my family.  Before that, I was never a chef, by any means.  I was capable of making simple items like a grilled cheese or some boxed max and cheese but nothing that would have been considered from scratch or that contained more than a few ingredients.  Over time I became more and more interested in cooking.  Fortunately, for people like me, there are a million websites for beginning chefs who need even the most basic of assistance, and now there is Pinterest, which is a cook-in-training’s best friend.  Because of the internet, thousands of recipes are available to you in the click of a button. 
 
My sister pinned the original recipe for Salsa Chicken from Pinterest a while ago.  I never looked at it because the picture isn’t the most appealing photo that could have been taken of that recipe.  One day, I was bored with what we had for dinner options and decided to give it a try exactly as the recipe stated.  We absolutely loved it!  My sister said that they have served it over rice, in tortillas, or just alone with a side dish.  It is amazing with any of those options.  Our favorite way to serve it is over a homemade Spanish rice
 
Of course, because we are who we are, the subsequent times that we made this recipe we changed up the ingredients a bit.  Now that we have a different version we like it so much more.  This recipe originally called for sour cream to be added into it, but we changed that to cream cheese and we love that addition.  It gives the dish a creaminess that fools your body into thinking that it is super cheesy without all of the added calories of putting cheese into the dish on top of the sour cream.  We also add more than double the salsa that it calls for.  We love spicy things and if Grace wasn’t eating with us and if the babies toddlers weren’t eating out of our bowls, we would probably make it spicier.  What makes this recipe even better is that it cooks in the crock pot and is completely a ‘set it and forget it’ style meal.  This recipe is very simple and easy to assemble. 
  
Salsa Chicken
Prep Time: 10 mins
Cook Time: 4 hours
 
2 frozen chicken breasts
1 can reduced fat Cream of Chicken Soup
2 cups your favorite salsa
3 ounces fat free cream cheese
1 can black beans
 
**Refer to this post here, if you have not made your homemade Taco Seasoning.  If you don’t intend to do that, you would substitute an entire pouch of Taco Seasoning from the store in this recipe.
 
Place 2 frozen chicken breasts in the bottom of your crockpot.  Sprinkle taco seasoning evenly over frozen chicken.  Pour cream of chicken soup and salsa on top of chicken.  Do not stir.  Cook on high for 3.5 hours.  After 3.5 hours, remove lid, shred chicken, add can of black beans, and cream cheese and stir to combine.  You can either remove the chicken from the crock pot and shred outside of the container using whatever method of shredding chicken that you prefer, or you can use two forks and shred it while it’s still in the pot.  We have done it both ways and it yields a similar result both ways. 
 
Serve over rice, wrapped in tortillas, or on its own with a veggie or salad.  We have had it several different ways and I must admit that I love it served over rice.  You can easily substitute sour cream for cream cheese and you can use the full fat/calorie versions of all items as well but we are trying to make this as healthy as possible.  You can add more or less salsa depending on how spicy you like it.  The original recipe called for 1 cup of salsa and I don’t think that you should add any less than that for fear of it being too thick or losing some of its necessary flavor. 
 
Made as our recipe describes there are 302 calories in a 1 cup serving.  This will make approximately 6 servings of 1 cup each.  This is very filling and using our Spanish rice recipe makes the total calorie count still appropriate for a calorie conscious dinner and it is very filling. 
 
Try it out and let me know if you make any substitutions as I am always looking forward to trying new variations of my favorite recipes. 
 
Enjoy!
 
-Sara


52 in 52 #22 Sweet Dough for the Bread Machine

So I made cinnamon rolls a few weeks ago and they were amazing.  Well, I thought they were amazing; Corry thought they were 'so-so'.  I have always wanted to have an amazing cinnamon roll recipe in my proverbial back pocket for recipes, so I kept looking. 

I looked for every kind of cinnamon roll on Pinterest and was unimpressed by most of them.  I knew that I wanted the mixture for the inside to have more than just brown sugar and cinnamon but I wasn't sure what I wanted that to be. 

Thursday night was a pretty significant ice storm in DFW, so what better to do on a Friday morning when you are iced/snowed in, than to experiment with homemade cinnamon rolls?  Corry found this recipe on Pinterest for Sweet Bread Dough that we can make in the bread machine.  It was simple to put together with basic ingredients that most people would have on hand.   

A warning:  This dough is VERY sticky.  We only used the bread machine to mix/knead the ingredients together and then we took it out to rise in the oven because we were making two batches so we would have some for this morning as well.  After the dough rose for right at an hour, I took it out and kneaded about 1/2 cup flour into each batch just to make the dough manageable enough to roll out. 

We used this recipe for both our Basic Cinnamon Roll recipe (shown above) and also our Fancy Cinnamon Roll recipe and they both turned out amazing.  This dough is not overly sweet and could be used with any cinnamon roll recipe that you would like to try. 

Cinnamon Roll Dough for the Bread Machine
Prep time: 5 mins
Mix time: approx. 20 mins - we aren't sure how long - just use the 'dough' button on your machine and wait for it to stop mixing/beating
Rise time: 1 hour

Ingredients:
3/4 cup milk
2 Tbsp butter
1 beaten egg,
2 and 1/4 cups bread flour
1/4 white sugar
3/4 tsp salt
1 and 1/2 tsp yeast

Instructions:
Select loaf size on your bread machine.  Add all ingredients and select Dough button.  Remove from machine once dough has finished kneading.  Add to well greased pan, and cover with a greased piece of plastic wrap.  Allow to rise in a warm, draft free location for an hour.  Once risen to at least double the original size, remove from pan and knead in enough flour to make dough less sticky.  You don't want the dough to be too sticky or else you won't be able to roll the dough out.  Fill with your desired toppings and bake according to instructions for your recipe.  See recipes for Basic Cinnamon Rolls or Fancy Cinnamon Rolls. 

Enjoy! 
 

Homemade Spanish Rice

Our family is a huge fan of Spanish rice.  We used to use a random recipe that my husband found and it was good but this recipe that he makes now is amazing.  It always turns out great and is very easy to manipulate the basic recipe to your liking. 

We serve this with our Salsa Chicken, with our Green Chile Chicken Enchiladas and basically any other time I can convince my husband to make it.  This is even a hit with our teenager and our toddlers.  It has awesome flavor and doesn't have too much heat.  If you wanted to increase the heat you could just add more cayenne.  This rice is awesome as well the second day.  Because it is so tender the day that you originally make it, the rice doesn't dry out when you try to reheat it. 

Spanish Rice
Prep time: 30 mins
Cook time: 20 mins

Ingredients:
1 whole onion, chopped
1 Tbsp minced garlic
2 and 1/2 cups chicken stock
1 cup jarred tomato based salsa
pinch of cayenne
1 tsp paprika
1/2 tsp cumin
salt to taste
frozen corn
diced carrot
1 and 1/2 cup rice
2 Tbsp olive oil

Instructions:
Add oil to pan, heat and sweat your chopped onion.  Once your onion has sweated, add rice and brown to your liking.  While rice is browning, add salt, cumin, paprika, cayenne, salsa, and chicken stock to a bowl and blend with an immersion blender.  (If you don't have an immersion blender, you can use a regular blender.  The idea is to get the salsa pureed a bit more.)  Add garlic to browned rice and continue to brown for approximately one minute.  Pour liquid mixture into browned rice.  Add corn and diced carrots and bring the entire pot to a boil and boil for one minute.  Once one minute has passed, turn the heat down to low, put a lid on the pot and do not open for 20 minutes.  After 20 minutes, open the lid, fluff the rice and serve.

Enjoy!  

Monday, November 25, 2013

52 in 52 #19 - Chicken Noodle Soup

I have been looking for a recipe for a decent chicken noodle soup forever.  All of the ones that I have tried so far have either had way too much salt, not enough seasoning at all, noodles that fall apart, or something else that made you think that you wasted an entire evening cooking something that you just want to throw away.  Since I have been having some luck with Pinterest recipes lately and since it was perfect soup weather today in DFW, I figured that I would try out one of the popular recipes that I found this afternoon. 

Thanks to wanting to make a chicken pot pie at some point during this month, I already had the ingredients for this recipe on hand.  I also took a look through the recipe to ensure that there weren't any steps that made me rethink the author's sanity.  This is a step that I used to not perform, and then I was burned by several awful recipes and decided that I had to start previewing the recipes before cooking.  This recipe did not seem to have any out of the ordinary steps, so I figured that we were good to go. 

This recipe is very good and was an excellent end to a cold, rainy day here in the Metroplex.  My husband said that the seasoning was lacking something but I think that he is looking for something that he is never going to find with a recipe for chicken noodle soup because my kids and I thought that it was great.  I did make a few minor changes to the recipe.  The original is here and you can find mine detailed below. 

Homemade Chicken Noodle Soup
Prep time: 15 mins
Cook time: 1 hour 30 mins

Ingredients:
2 whole chicken breasts
1 medium to large onion, chopped
3 tbsp. chopped garlic
2 tbsp. olive oil
1 lb carrots, chopped
1 bunch celery, chopped
1 bay leaf
1 tbsp. chopped, dried parsley
1/2 tsp thyme
1 tsp dried basil
1 tbsp. salt
1 tsp black pepper
water
16 oz egg noodles

Place chopped garlic and onion in large stockpot with olive oil and sauté over medium heat until tender.  Add carrots and celery and continue to sauté for 2-3 minutes.  Add herbs, salt, pepper and chicken breasts to pot and cover with 8 cups of water.  Bring the mixture to a boil and immediately reduce to a simmer.  Continue to simmer for one hour.  After one hour, remove the chicken and shred finely with two forks.  Add at least 1 tsp more salt at this time, depending on how salty you like your soup.  Add a little more than you care for, because you have yet to boil the pasta and add additional water and that will lessen the saltiness of a soup.  Add the noodles, raise heat and boil for 7 minutes.  After 7 minutes, add chicken back into mixture and add at least 2 cups more water.  I had to add another 5 cups to get the amount of soup that I was looking for and to even out the liquid to noodles mixture.  Ensure that water that you are adding is hot or else you will have to spend another 5 minutes heating mixture again to avoid hot and cold spots in your soup.  Season again and serve warm. 

Enjoy!


Sunday, November 24, 2013

52 in 52 #18 - Pioneer Woman Meatloaf

So, I'm going to be completely and totally honest here... I am not a meatloaf fan.  I never have been and probably never will be the biggest fan of it.  My mother didn't care for it and thus didn't serve it a lot, so I never really got the chance growing up to become accustomed to it.  Now that I am a grown up, it doesn't make my meal plan a lot, even though my husband loves it.  I resolved to change that this month because I know that he loves it and doesn't get to have it a lot.  Plus, I saw that the Pioneer Woman has a recipe for it and I figured that her recipe was bound to be amazing since I have yet to try a recipe by her that wasn't completely awesome. 

This recipe definitely did not disappoint.  I mean, it's covered in bacon... how bad could it really be?  Everything is better with cheese and bacon, right?  If you aren't saying "Right?" right now, we can't be friends anymore...

This meatloaf is moist and flavorful, and the sauce for the top is amazing.  I made a small modification because we don't have Tabasco in our house, but I would imagine that even if you made it exactly the way that it called for in the recipe that it would be amazing.  I will say that I am stating our cook time that it took in our oven.  Her recipe stated that you should cook the meatloaf for 45 ish minutes and after that time our loaf was no where near done.  We used a probe thermometer to ensure that it was cooked through and ours took roughly an hour and a half to cook through.  Keep an eye on yours and ensure that it is fully cooked before consuming.  Pink in the middle is not acceptable for this recipe. 

Definitely make this recipe if you or anyone you know is a meatloaf fan and they will think that you are awesome! 

Simple Meatloaf
Prep time: 15 mins
Cook time: 1 hour 30 minutes

Ingredients:
2 lbs ground beef
1 cup shredded Parmesan cheese
1/3 cup fresh minced Parsley
4 beaten eggs
6 slices white bread
1 cup milk
3 tsp salt
pepper to taste
1 tbsp. seasoning salt
10 slices thin bacon
1 and 1/2 cups ketchup
1/3 cup brown sugar
1 tsp. ground mustard
Sriracha to taste

Instructions:
Preheat oven to 350 degrees.  Place six slices of white bread in a bowl and cover with milk.  Allow to soak for a few minutes.  This part is crucial for the texture.  Bread crumbs are not an acceptable substitution in this recipe. 

Mix eggs, beef, cheese, salt, pepper, seasoning salt in a bowl and mix thoroughly.  Crumble bread and milk into this mixture and completely combine.  As odd as this sounds, your hands are the best tools to combine a meatloaf's ingredients together. 

Once your ingredients are completely combined, form into a loaf shape on a broiler pan.  Ensure that you have another pan underneath to catch drippings.  For your sanity, I would cover that bottom pan with aluminum foil.  This will allow for easy clean up when you are in a food coma after consuming this amazing dish. 

Once your loaf is formed, top with bacon slices.  Combine ketchup, brown sugar, mustard, and Tabasco.  Pour 1/3 of the sauce over the bacon slices and spread evenly.  Bake in oven for 1 hour and 15 minutes.  Remove from the oven, top with 1/2 of the remaining sauce and continue baking for 15 minutes.  Check the temperature.  We looked for 165 degrees.  You can technically cook it shy of that temperature but you are safe at 165.   Note:  I am using a picture from the Pioneer Woman's own recipe post.  In all the excitement of dinner finally being done with three starving kids, I forgot to take a 'final' photo.  This will not be the last time that we will make this so I will update with a 'real' picture of mine when we make it again. 

Serve with remaining sauce and your choice of side dishes.  We served it with the Crockpot Macaroni and Cheese

Enjoy! 


52 in 52 #17 - Crockpot macaroni and cheese

I love my crockpot(s).  I love macaroni and cheese.  So when I saw this recipe for a crockpot macaroni and cheese, my heart was overjoyed.  You mean, I wouldn't have to stand over the stove and cook a roux, cook noodles and then wait for all of this to bake?  I could really just par-cook noodles and then throw all this stuff in the crockpot and 4 hours later like magic it would be done?  This is like modern day magic! 

I was anxious to test this out as Thanksgiving approaches.  In our family's Thanksgiving celebration, we are in charge of the side dishes.  I am always on the look out for a good macaroni and cheese recipe.  While this recipe that I blogged about the other day was delicious, I am not going to be home for the crucial cooking time for that recipe and was hoping to find something that could just hang out in a crock pot and cook itself. 

I will say this about this recipe... it is cheesey.  For someone who likes a macaroni and cheese that tastes extra cheesey, then this recipe is totally for you.  For us, it was too cheesey.  It tasted, honestly, like we could have half-ed the amount of cheese in the recipe and been completely fine.  And I will admit that I even added more noodles than I should have because it seemed like the balance was already off from the get go.  The taste was good and it would honestly probably work with half of the Velveeta, or half of the Colby and jack cheese(s).  Also, for all of you readers that have the larger circular crock pots or crockpots that heat to a hotter temperature, you might want to cut the time back as well.  I was using our larger circular crock pot and it boils on low some how, so I should have also cut the cook time back by at least 30 minutes or used our smaller crock pot which actually is a low temperature when set to low.   

Even though the finished product was not what I intended, I will definitely be making this again and will update with the changes that I make to the recipe.  I am bound and determined that I will find a simple but delicious macaroni and cheese recipe that I can share with you all.  If you have one that you think would make the cut, please email me! 

Crockpot Macaroni and cheese

Prep time: 15 mins
Cook time: 4 hours

Ingredients:
2 cups cooked macaroni noodles
16 ounces Colby cheese, cubed
16 ounces Monterrey Jack cheese, cubed
16 ounces Velveeta cheese, cubed
1 stick of butter, cubed
salt and pepper to taste
2 cups whole milk

Instructions:
Boil macaroni noodles for 4 minutes, tops.  It is going to seem very odd to only cook them for such a short time, but believe me, if you cook them any longer they will be mushy and gross by the time your macaroni and cheese is ready to serve. 

Layer macaroni, cheeses, butter, salt and pepper together starting and ending with your cooked pasta.  Once the layers are complete, pour milk over the top. 

Cover and cook on low for 4 hours.  Stir only twice - once halfway through and once at the end.  Any more stirring than that and you will risk breaking down your noodles and turning the whole thing to mush. 

Beware that the edges will get very dark brown.  This will be similar to baked macaroni and cheese.  Ours did not get as brown as I thought that it would, but rest assured that it will not burn and those pieces are acceptable to be stirred in or eaten separately by the person cooking. 

Enjoy! 

Sunday, November 17, 2013

52 in 52 #15 - Southwest Chicken and Rice Casserole

I promise I am going to blog about something other than recipes... eventually.  I have been in the zone lately making recipes that I find from Pinterest, it seems.  And (knock on wood) they have been mostly positive experiences. 

Next up on the list is Southwest Chicken and Rice Casserole.  Let me be honest here... I was originally annoyed by this pin because it is just a picture when you click on it.  I don't understand why people do this for a recipe.  Take me to someone's blog or website that has made the recipe and can give clear, descriptive instructions.  I don't want to see a picture with your less than 100 words of description/recipe.

With that being said, I still took the chance and it turned out great.  Our latest version of taco seasoning that we made is a little bit more spicy than I care for, but it made this dish very flavorful. 

Southwest Chicken and Rice Casserole
Prep time: 15 mins
Cook time: 25 mins

Ingredients
2 large chicken breasts
2 cups instant rice - we used brown
3 tbsp. homemade taco seasoning or 1 packet
1 can tomatoes and green chiles
1 1/2 cups water
grated cheese

Instructions:
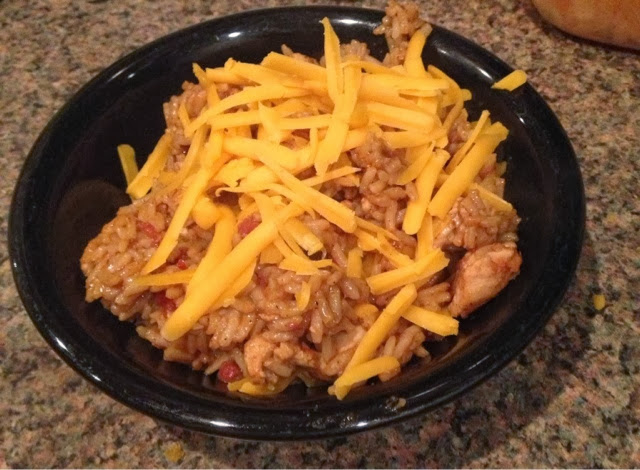
Cut chicken up into bite sized pieces.  Add water, taco seasoning and tomatoes and green chiles.  Heat until boiling.  Add rice and stir together.  This is where we differ from the recipe.  We heated our mixture to boiling again after the rice was added, then immediately covered and moved the temperature down to low on our stove top.  Once water is absorbed, stir completely to combine and top with shredded cheese. 

We served ours in a bowl and it was amazing!  It has great flavor and is super easy to make.  The cheese melts and makes it creamy and delicious! 

Enjoy!


Saturday, November 16, 2013

52 in 52 #14 - Persimmon Cookies with an orange glaze

A few weeks ago we got this mysterious orange fruit in our Bountiful Baskets haul.  While everyone is picking up their food, it is difficult to talk to people about what you are getting because it is mildly chaotic, so I just figured that I would look it up at home.  Lo and behold... a persimmon.  Before that day, I can't say with confidence that I knew what a persimmon even was. 

I have been trying to use everything that we get out of our baskets and let less go to waste, so I knew that I wanted to use them in something.  A quick search on Pinterest and voila - persimmon cookies!  I told a friend at work about them and he instructed me to freeze them because they are supposedly better after a first freeze and since ours would have been harvested before that then they probably weren't technically ripe and awesome tasting yet.  Into the freezer they went... 

My first batch of cookies tasted awesome but I knew that the texture could be better so I decided to try out pureeing the fruit and see how that did.  Once out of the freezer they defrost very quickly and the fruit turns kind of mushy.  If you are not going to use them in cooking, and want more of a raw fruit experience, I would not freeze them.  However, for this recipe it was a great idea!  Give it a try! 

Persimmon Cookies with Orange Glaze
Prep time: 15 mins
Cook time: 12 per batch

Cookie ingredients:
2 cups all-purpose flour
1 tsp baking soda
1/2 tsp salt
1 tsp cinnamon
1/2 tsp cloves
1/2 tsp freshly ground nutmeg
1/2 cup unsalted softened butter
1 cup sugar
1 cup persimmon pulp (from 2-3 persimmons)
1 large egg
1 tsp vanilla

Orange glaze:
2 cups confectioners' sugar
1/4 cup fresh orange juice - we used at least 1/3 cup if not more
zest from oranges that you are juicing

Preheat oven to 350 degrees.

Whisk together the flour, baking soda, salt and spices. Set aside.

Cream the butter with the sugar. Puree the persimmons and beat in persimmon pulp, egg, and vanilla.

Slowly add in the flour mixture until everything is combined.

I use a small ice cream scoop for similarly sized portions of dough.  Bake for approximately 12-14 minutes or until cookies are brown around the edges and set. They will still look a little under done, but that is perfect!  Let cool on baking sheets for five minutes and then remove to a wire rack to cool completely.

To make the orange glaze, combine the confectioners' sugar, orange juice, and zest together. Whisk until smooth. Spoon glaze over each cookie.  Set cookies back on wire rack for glaze to harden.

These cookies have an amazing cake-y texture and the orange glaze really makes them special.  We love a really orange flavor in our glaze so cut back the juice and zest if you do not love as much orange flavor. 

Enjoy!

Tuesday, November 12, 2013

52 in 52 #13 - Extra cheesey macaroni and cheese

Honestly, does the Pioneer Woman make anything that isn't awesome?  I should have known when I went in search of a macaroni and cheese recipe that I would find one that was amazing.  Let me back up...

Almost anyone that you cooks seems to believe that one of the easiest things that you can cook is macaroni and cheese.  I am here to tell you that I think that is wrong.  I am a relatively decent cook most days, and I have royally screwed up more macaroni and cheese dishes than I care to admit.  I, however, was bound and determined to find one that was not a complete disaster. 

Back to the Pioneer Woman... we have made one of her awesome recipes before and I would be willing to bet that she is capable of coming up with a recipe that isn't amazing.  She loves butter and cheese as much as the next guy, and how can anything be bad with butter and cheese?  This macaroni and cheese was creamy and cheesey and amazing. 

Extra cheesey macaroni and cheese

Prep time: 25 mins
Cook time: 20-25 mins

4 cups dried macaroni noodles
4 tbsp. butter
1/4 cup flour
2 1/2 cups whole milk
2 tsp dry mustard
1 whole egg
1 pound cheese
salt & pepper to taste

Preheat oven to 350 degrees and grease a 2 qt casserole dish

Cook macaroni noodles until very al dente.  I cook mine roughly 5 minutes.  Remember they will continue to cook in the oven. 

Melt butter in a large saucepan.  Sprinkle in flour.  Cook mixture for 5 minutes, whisking constantly.  Be careful to not allow mixture to get too brown. 

After 5 minutes, add milk and dry mustard.  Continue to whisk and cook for another 5 minutes.  Mixture will be smooth and thick.  Turn heat to low after 5 minutes. 

Remove 1/4 cup of mixture and whisk vigorously with the beaten egg.  Add egg into saucepan and continue to whisk vigorously until fully combined and smooth.  Mixture will become very thick. 

Remove from heat and add all but 1/2 cup of cheese.  Stir until melted.  Season generously with salt and pepper. 

Add noodles and stir well to combine. 

Spoon into greased baking dish and top with remaining cheese.  Bake uncovered for 20-25 minutes.  Cheese on top will be melted and dish will be bubbly on the sides. 

Enjoy! 


Monday, November 4, 2013

Easy Breakfast Casserole

I have read different recipes from every corner of the Internet claiming to offer an easy, healthy breakfast option to the consumer.  Most of those, after careful inspection, are lackluster in flavor, substance, or are not really as easy as they claim to be.  When it comes to making breakfast, the easier the better, for me.  I don't want a 900 step recipe to follow in the morning when I shouldn't even be trusted to find my own shoes. 

Luckily for our family, I found a recipe for an easy breakfast casserole years ago.  Over time, we have adapted it to fit our new tastes and diet.  Honestly, other than pouring a bowl of cereal, I don't know that you could cook a recipe that was more simple than this in the morning.  This meal also fills you up enough to be a good substitute for dinner.  Who doesn't love breakfast foods for dinner every once in a while? 

easy breakfast casserole
Easy & Healthy Breakfast Casserole
Prep time: 15 mins
Cook time: 45 mins

6 eggs - we use the Aldi brand of Egg Beaters and they are awesome. 
1 lb of turkey sausage, crumbled
1 package of low calorie crescent rolls
8 oz low calorie Colby Jack cheese

Preheat your over to 350 degrees. 

Brown the sausage.  Sometimes we buy the patties and crumble them up and sometimes we buy in bulk.  The calorie count is pretty similar, so I just work with what we have on hand.  Drain the fat from the sausage.  This is an important step or else you end up with grease elsewhere in your dish and that is less than ideal.

Press the crescent rolls into the bottom of a well-greased 13 x 9 pan.  I am emphasizing well-greased for a reason.  If you decide to skip that step, you will run the risk of not being able to eat any of the crust that forms on this meal because it will be horribly stuck to the pan.  Don't ask how I know. 

Once you have the crescent rolls pressed out into a flat layer in the bottom of your pan, pour the drained sausage crumbles over the layer of crescent rolls. 

Pour the beaten eggs over the sausage evenly and top with the shredded cheese. 

Bake at 350 degrees for 30-45 mins until the crescent roll layer is browned and crispy on the edges, the cheese is melty and the eggs are set. 

Enjoy!

Wednesday, August 14, 2013

52 in 52 #10 Homemade Yogurt Melt Snacks

I have seen this pin like 9,000 times on Pinterest.  My kids were never that into the yogurt melts when they were younger, but they love yogurt now so I figured that perhaps this would be a less messy way to indulge their taste for yogurt.  I don't know what it is about yogurt but I can barely eat yogurt as an adult without getting it everywhere so you can imagine two toddlers and the mess that comes after them trying to eat yogurt on their own. 

The basic idea of this pin is very simple.  Dump a container of yogurt into a plastic sandwich bag, cut the tip, squeeze dime-ish sized dots onto a foil lined baking sheet, freeze and then enjoy.  Sounds simple.  I went into this however with apprehension because I have been burned by pins

that appear easy before. 

Homemade Yogurt Melt Snacks
Prep time: 10 minutes
Freeze time: 2 hours

1 container flavored yogurt
1 baking sheet
aluminum foil
plastic sandwich bag

Line the baking sheet with aluminum foil.  Decide which yogurt flavor you want to make your snacks out of. 
 
Empty the yogurt container into the plastic sandwich bag and cut a *small* hole in one of the tips.  I quickly learned that what I first considered a small hole was vastly too big. 
 
Drop dime sized dollops of yogurt onto the baking sheet.  Be careful to not put them too close together unless you want them to run together and become bigger 'dots'. 


Freeze baking sheet with yogurt dots for at least 2 hours.  They will probably be frozen through sooner than that, but I think that it works better if they are SUPER frozen.  Once they are frozen through, you can gently scrape them off of the foil and store them in a plastic bag or container in the freezer, like this:


Now, since you are flash freezing your melts they will start to melt once you remove them from the freezer so unless you live in Antarctica, this is not a good "on the go" snack.  Mine also are starting to break apart a bit every time they are handled in the freezer.  I don't know how to rectify that problem.  However, they do amuse children and are super easy to make.  I haven't purchased the packaged variety of these snacks in over a year, but I would definitely be willing to say that these are cheaper than the ones that you can purchase at the store. 
 
Give this a try and let me know how it works out!
 
-Sara 


Thursday, August 8, 2013

52 in 52 #9 - Homemade Taco Seasoning

Homemade Taco Seasoning – Pinterest Project #9
 
I have had my eye on this pin to make my own taco seasoning for months.  This is one of those items that I would not have previously brought up to my husband.  My husband is very practical and one of the things that he always wants me to think about is the amount of time, effort and money that it would take to make something personally versus the amount of money that it would cost just to purchase something pre-made at the store.  Since a packet of taco seasoning is like $.80 at the store and I figured that he would be less inclined to indulge my desires to try this recipe at home.  Luckily he was feeling generous that day and he actually seemed like he was into it. 
 
The original pin that I used as inspiration is here.  I was very interested in at least trying this because I figured that it would solve at least a few of my issues with the packets of taco seasoning.  We eat tacos, salsa chicken and other recipes that require taco seasoning a lot, so we were always buying at least a few packets of that seasoning mix when we went to the store.  We buy a lot of spices for chili mix and other cooking adventures so I knew that we would have everything on hand, I was always just hesitant to try a new recipe because I didn’t want it to be horrible.  Also, with the packet of seasoning, I was always getting HORRIBLE heartburn with it no matter what we put it in.  I am not sure what is in that mix that causes that but this homemade version definitely does not do that, which is awesome. 
 
Homemade Taco Seasoning
Prep time: 10 minutes
 
2 Tbsp chili powder
½ tsp garlic powder
½ tsp onion powder
½ tsp red pepper flakes
½ tsp oregano
1 tsp paprika
1 Tbsp cumin
2 ½ tsp salt
2 tsp black pepper
 
Combine all ingredients in a small bowl.  Mix well and store in an airtight container.  Use 2-3 Tbsp per 1lb of ground meat depending on how flavorful you like your dishes. 
 
This seasoning blend tastes amazing in any dish that you would use the store bought mix in.  There are several different things that I love about this mix:
 
·         It’s customizable – you can add more or less salt if you like.  We use smoked paprika in place of regular paprika and we also usually add more red pepper flakes since we like ours a bit more spicy than some other people.
·         You don’t get that gross, heartburn-y feeling after eating this mixture.  There are no preservatives that aren’t already in the spices themselves and there is no MSG to leave you with an upset stomach like the package mix. 
·         We buy our spices in bulk most of the time, so this recipe ends up being fairly comparable as far as price is concerned to the package.  It will cost maybe a few cents more per use but to have something that tastes much better and you can customize makes it totally worth it.  Plus, people are impressed when you say that you make your own spice blend. 
 
You can buy cheaper mixes and get a bland result but if you are looking for something to add some kick to your dishes that require a taco seasoning packet, give this one a try.  Let me know what you would add or remove to make this blend different for your family.  I am always in the market for substitutions to try.